The Bikini Body Detox

The Bikini Body Detox

…AKA three days of living on apple cider vinegar, lemon water and kale smoothies, AKA me not being able to have coffee, eggs, oats, or any of the regular staples in my diet. Interesting times!

I’m halfway through Day 2 as I write this, and it’s been eye-opening to say the least. Despite spending the last year trying to get my eating under control, it’s clear I still have impulse control issues. Yesterday, I got hangry as fuck simply because I knew I couldn’t eat if I wanted, as opposed to being actually hungry. Today, I had a Bitch Bake to do, and even though I chugged my way through my ‘Love Smoothie’ as I baked (cucumber/pear/kale/avocado/lime/chia seeds blended with a small amount of water), the fact that I knew I wasn’t supposed to eat any of the cookies made them more irresistible than usual.

I caved. I had to have one. And considering I worked out that I ate less than 750 calories yesterday (about half what I normally eat, and only 2/3 the minimum RDI for a female, FML…), one cookie isn’t going to hurt, right?

And just look at them: salted chocolate M&M cookies. I’m not even going to try and pretend these are healthy in any way, but they’re absolutely one of the best things I’ve baked – though that could be because I’ve already forgotten what chocolate is like!

IMG_3471

They’re based on a Betty Crocker recipe which I think is designed to be slightly healthier, but come on – it’s a sodding chocolate biscuit, let’s be realistic. Adding the salt flakes was my own idea, because I obviously felt the need to punish myself even more than I was by committing to drink apple cider vinegar three times a day, but hey – there’s a reason salted caramel has become so popular, and salted chocolate is even better in my opinion!

If you want to make them yourself, here’s how I did it!

  • 75g soft butter
  • 100g white sugar
  • 85g brown sugar
  • 1 egg
  • 1 t vanilla

Beat butter and sugars together in a large bowl until light and creamed – about 5 minutes – then beat in the egg and vanilla until combined.

  • 150g self raising flour
  • 50g cocoa
  • 100g M&Ms

Sift the flour and cocoa into the butter mixture and stir to combine, then mix in the M&Ms.

Take tablespoons of the mixture, roll them into balls, and place on a lined baking tray. Press down slightly, make sure there is a couple of inches between each ball, and bake at 190C for 8-10 minutes. As soon as the cookies come out of the over, press down with a fork to flatten and sprinkle with sea salt flakes. Leave to set for a couple of minute before placing onto a rack to cool properly.

They’re just so good. This made 20 decent sized cookies with 3-4 M&Ms in each, which came out at 125 calories each. They could be worse, but I promise that if you have one, you’re going to want to eat four. They’re so chewy and chocolatey and delicious, they’re pretty much the worst recipe I could have picked to make while detoxing!

So there you have it – I’m off to drink more lemon water…happy baking (and eating)!

Mish x

A-B-C, easy as 1-2-3!

A-B-C, easy as 1-2-3!

For the time in what feels like months, I had a free Saturday morning at home. I dozed until 9am before getting up, putting last week’s Masterchef episodes on and setting myself up for a relaxed morning in the kitchen.

My flatmate is a huge banana bread fan, but is also trying to cut back on her sugar intake. She’s in her ‘busy season’ at work and has been pulling some big shifts at work, so I thought I’d make her life a little easier and make her some healthy banana bread so she didn’t have to miss out on her favourite treat. If I want to make banana bread, there’s only one place on the internet I go, which brings me to the ‘A’ of my ABCs.

Ambitious Kitchen is my favourite food website in existence. It’s full of healthy recipes that are full of flavour, which is really important to me – I’m not interested in eating healthy by having to force down food that just tastes like cardboard! There’s cookies, brownies, cakes, salads, soups…no matter what you feel like, you’ll find something to make! There are several banana bread recipes on the site, but this one is my favourite, because of the ‘B’ and ‘C’ it involves – berries and coconut.

The first time I made this I used raspberries because they’re my fave, but frozen blueberries were on special, so blueberries it was – definitely not the worst substitute ever! I also used threaded coconut the first time, which is a bit more robust than standard dessicated coconut, and I think I prefer the texture of the threaded coconut more…you do whatever works for you!

Here we go!

Berry Coconut Chia Banana Bread

  • 150g standard flour
  • 75g wholemeal flour 
  • 3/4 t baking soda
  • 1/4 t salt

Sift the above together into a large bowl and set aside.

  • 250g mashed ripe banana
  • 1 T rice bran oil
  • 50g coconut sugar
  • 2 t vanilla extract
  • 1 egg
  • 90g plain yoghurt (I use the Anchor Protein+ variety)
  • 100ml coconut milk (if you use only standard flour, you will probably need only half this)

In another bowl, beat/blend the above together until really smooth. Gently fold the dry ingredients into the wet ingredients until barely combined.

  • 100g frozen blueberries
  • 30g shredded coconut 
  • 15g chia seeds

VERY gently fold the berries, coconut and chia into the batter and spread into a lined loaf tin. The batter will be quite thick

IMG_3435

Sprinkle an extra teaspoon of sugar over the top to get a nice crust on top, and bake at 180C for around an hour – this is really going to depend on your oven, so I suggest baking for 50 minutes and checking every few after that depending on whether a skewer comes out clean.

Dat crackly, shiny crust…

IMG_3437

An alternative is to bake this in muffin cases – it will greatly reduce the baking time (more like 20 minutes), but make sure your cases are super well greased as usual. Regardless of how you bake this, almost every mouthful will be bursting with juicy blueberries, along with the slight crunch of chia in contrast to the moistness of the bread.

Urgh, I’m salivating just thinking about this again…

img_3438.jpg

I ended up with a loaf and 4 muffins as there was a little too much batter for the loaf tin. For 16 servings (12 slices from the loaf). a serving came out at 120 calories a slice/muffin. Like much of what I make, it’s not hugely sweet (it’s sweeter with raspberries), but very moreish – if you use properly squishy ripe bananas, they will naturally sweeten the bread without needing lots of sugar. Besides, being so low in calories, you can then justify eating a slice with yoghurt, or, my favourite sneaky addition, smearing a teaspoon of creamy nut butter over one. My obsession at the moment is the chocolate almond butter from Pams Finest. Yuuuuuuuuuum.

IMG_3439

If you’re feeling naughty (or just less calorie freaky than me), add in some white chocolate chips or some nuts, or both, or anything else you like. You could do blueberries AND raspberries, sprinkle coconut on top instead of sugar, mix cinnamon with the sugar before sprinkling it over the top…get funky with it!

One big tip – this will be extremely hard given how amazing the bread will smell while it’s warm, you need to wait until it’s cool before slicing, because it WILL fall apart otherwise. I didn’t wait, and my slices got quite mangled – it still tastes great, but people might look at it a little hesitantly if you serve it to them!

Well, there’s bread and nut butter calling my name – happy baking!


Mish x

The No-Baking Baker

The No-Baking Baker

Hola!

It turns out the best way to actually find time to bake and blog is to get sick and be bed-ridden for two days…and even then I didn’t technically ‘bake’, but that’s not the point!

It’s not like I haven’t been baking – I tried the other day to make some chickpea flour banana bread muffins to blog, buuuut I got distracted while they were in the oven and they turned out brown, dry and not great. I also made berry coconut chia banana bread which turned out fantastic, but I was in a rush and didn’t measure out the ingredients – I’ll definitely need to make that again, not just to share here but also because the lovely lad I’ve been seeing keeps reminding me about how great it was!

But, after coughing and spluttering in bed for a couple of days, I finally felt well enough to get up and dressed and think about trying out some of the recipes I found while aimlessly scrolling online recipes to entertain myself. Which brings me to what I tried out today…Applesauce Blondies!

I was inspired by this recipe, which uses 3 ingredients and calls them ‘brownies’. There’s no chocolate involved so I couldn’t really bring myself to call these brownies, and even calling them blondies is pushing it – it’s really more like fudge – but whatever you call them, they’re yummy!

The cool thing about these is that you can add whatever you want to the base recipe – I added diced apricots and sprinkled coconut on top, but I’m imagining how delightful this would be with white chocolate and macadamia nuts…mmmmm….but no matter what you add, they take all of 5 minutes to make!

Apricot Applesauce Blondies

  • 60g coconut flour
  • 45g coconut sugar
  • 200g unsweetened applesauce
  • 20g smooth peanut butter (use proper creamy stuff)
  • 50g diced apricots
  • 1/4 t cinnamon
  • 5g threaded coconut

All you need to do is sift together the flour, sugar and cinnamon and mix in the applesauce, nut butter and apricots until well combined – the batter will be very thick and almost crumbly. From there, just dump it into a lined container, sprinkle over the coconut and press the batter down until it’s all even. Leave it in the fridge for at least 30 minutes, cut into 12 squares, and…that’s it. It honestly takes longer to wash the dishes than it takes to make the batter!

Based on the ingredients I used, 12 squares of the brownies/blondies/fudge/whatever come out to 75 calories each. They’re not huge, but with the coconut flour and peanut butter there’s plenty of fibre and fats to keep me feeling satiated, and they’re sweet enough to kill my sugar cravings without being ’empty’ calories.

This is what it looked like before I put it in the fridge:

IMG_3430

And this is what a set, cut square looks like on the inside – they’re definitely more fudgey than anything! I purposely blocked out the rest of the squares in the photo because I cut them SO unevenly I’m actually embarrassed. Like, my ‘measure twice, cut once’ Dad would probably disown me if he saw what I did to my poor slice.

IMG_3431


It’s vegan, it’s gluten free, it might be paleo? I never know what’s paleo and what’s not…regardless, it’s pretty versatile and handy if you have intolerances to deal with – and just leave out the PB if you can’t have nuts 🙂 

As always, happy baking, and I’ll be back soon!


Mish x


The Good Kind of Type 2

The Good Kind of Type 2

And just like that, life has got away on me, and this post is a week late!

Between work, exercise, chores and trying to maintain a social/love life, I feel like I barely have time to sleep sometimes, let alone write up what is supposed to be a somewhat worth-reading blog post…and then I hear about things like Enneagram Types, which I decide I need to read up on/find out what type I am at 11 o’clock on a Monday night, because it’s clearly critical to my life…

The person who told me about this particular personality test has spent the last week narrating everything I do with ‘oh, you’re such a Type 1!’ to try and get a rise out of me. I’ll admit, I like being organised, but it’s a necessity for me; we’ve established that I try and do too much most of the time, so I have to plan ahead to ensure I have time to fit everything into my day. And I generally like to do things properly, but within reason; we’ve also established that I can’t follow a recipe to save my life, so I’m definitely the kind of person who can accept ‘close enough’ in certain situations.

Regardless, I finally cracked on Monday and decided to take the test to see whether or not I actually am a Type 1 personality. Even just the overview of the nine Types had me quite skeptical; surely I’m much more helpful and affectionate than I am ambitious and image-conscious?

Sure enough, I took the test, and my top three Types were exactly as I predicted; Type 2 (The Helper), Type 6 (The Loyalist) and Type 9 (The Peacemaker). Generous and people-pleasing, but also very non-confrontational and a touch anxious. There was a certain satisfaction in knowing myself well enough to predict my results, but also interesting that someone else was sure I would be a 1-2-3; either I’m less of an open book than I thought, or I’m seeing someone who is just terrible at reading people!

This week’s recipe is one of my absolute favourites, and it seems fitting that it was a Bitch Bake, since Type 2’s are characterised by ‘being generous and going out of their way for others’. Now, if you’re wondering what the title of this post is getting at, it’s a reference to Type 2 diabetes, which you risk getting if you make this week’s recipe on a regular basis (we found this on the side of a block of butter about a decade ago – if it’s on a block of butter, you know it’s not health food!). Having been pre-diabetic in a past life, I don’t recommend it as a life goal, which is why I like making this into wee cupcakes – you can get a taste without killing your arteries!

I’ve teased this a couple of times, and it’s finally here – my Chocoholic Chocolate [Cup]Cake. This was my cake at my 21st, and it’s still my go to when I need a no-fail recipe. I even won a Valentine’s Day baking competition with this once! It’s slightly more complex than my usual ‘dry in one bowl, wet in another, mix one into the other’ recipe, but I promise it’s worth the extra admin 🙂

Here we go!

  • 125g butter, softened
  • 100g castor sugar 
  • 2 eggs
  • 1 t almond essence 
  • 100g plum jam (use raspberry, this is all I had)
  • 200g flour
  • 1 t baking powder
  • 60g cocoa powder, sifted
  • 1 t baking soda
  • 1 T instant coffee 
  • 1 C almond milk, warmed
  • 75g Whittakers 62% Dark Cacao, roughly diced 

I’m gonna number these steps, because there are a few here:

  1. Cream butter and sugar together until pale and fluffy
  2. Beat in eggs one at a time, then the essence and jam until well combined
  3. Warm the milk for ~30 seconds, dissolve the baking soda and coffee into the milk and set aside
  4. Sift together the flour, baking powder and cocoa
  5. In 3 rounds, alternate adding the dry ingredients and milk into the butter mixture on a low speed (flour/milk/flour/milk/flour/milk)
  6. Once combined, gently fold in the chopped chocolate
  7. Fill muffin cases 3/4 full with batter and bake at 180C for ~15 minutes, or until a skewer comes out clean (if you make a cake, it’ll need around 40 minutes)
  8. Remove from tin and leave to cool on a rack until cold, then decorate however you desire!

A few things. The original recipe says chocolate chips, but this is how I chopped my chocolate, because if I’m going to put actual chocolate into something, I want to really know it’s there:

IMG_3376

This is what a baked batch should look like – ugh, the cracks on top make me so happy!

IMG_3378

I decided last minute to ice mine with a combo of cocoa, honey and almond milk – I didn’t record any quantities which isn’t helpful, but if you start with three tablespoons of cocoa and a tablespoon of almond milk, just keep adding honey until you have a smooth, spreadable consistency (and you’re happy with the balance of cocoa and sweetness!).

IMG_3379

Without the icing, I got 23 cupcakes out of this recipe (god, that was an annoying number!), which came out at 140 calories a cupcake. It probably doesn’t sound like much, but these aren’t very big – if you want proper muffins, only make a dozen, or you could of course make an actual cake out of it like you’re supposed to…

A sprinkle of coconut to finish, and yet another bake is done and ready for boxing up! 

IMG_3380


As with any recipe, you can tweak it quite a lot – vanilla essence instead of almond (or even peppermint!), leave out the coffee, white chocolate instead of dark…I’m also curious as to what would happen if you swapped out half the jam for a creamy nut butter, and now I really want to try this…all the possibilities!

Right, next week I am going to post on time, I swear…though, I’m not a Type 1, so I may not be well-organised, fastidious and self-controlled enough to manage it…

Happy baking!


Mish x

Back to the place where I ‘belong’

Back to the place where I ‘belong’

Ahhh, what a week it’s been so far, and I didn’t even have a Bitch Bake to do this week! I’ve had plenty to keep me occupied, but my excitement about flying home tonight for Queen’s Birthday weekend has made the week draaaaag like nothing else.

I absolutely love going home to Marlborough. I know I’m biased, but I really do believe I grew up in one of the best parts of New Zealand. Case in point, the view from one of my many boating trips with my parents:

pelorus

I go home every Queen’s Birthday weekend, as it’s the Marlborough Smallbore Rifle Association’s annual championship, which means I get to go hang out at the local range for a few hours and catch up with all my old shooting buddies. While I don’t shoot anymore, my old club mates are still like family to me, so it’s really important that I get to see them on a semi-regular basis.

This year feels especially important, as the last time I saw everyone was in March when we had to gather together for the funeral of one of our dearest shooters (and my personal coach for years – miss you, Grubby!). It was a stark reminder that the ones we love aren’t around forever, so I definitely need to make the most of the time I do have with people.

Which brings me to this week’s bake! Friday night is when all the locals shoot so they’re free to run the competition on the Saturday for everyone else who comes along, and I’m staying true to form by taking some baking down for supper to share a little of the love I have for these people.

Another person I have an extreme amount of love for is Cupcake Jemma, whose recipe I played with for this. I could quite easily spend an hour a night on YouTube watching her videos over and over and over again. Her latest video is a tutorial on how to pipe Galaxy-themed buttercream…the woman is a god, I swear.

But as much as I love Jemma’s recipes as they are, blueberries are expensive, so when you already have dates and dried apricots in the pantry, it’s far more practical to spend a dollar on an orange and make Orange Date Apricot Crumble Cake instead.

Oh yeah – did I mention that this is definitely NOT one of my healthy recipes? Brace yourselves!

TOPPING:

  • 50g melted butter
  • 100g raw caster sugar
  • 50g oats
  • 1/2 t cinnamon

1ST MIXING BOWL:

  • 175g raw caster sugar
  • 4 T canola oil
  • 1 egg
  • 1 t vanilla essence
  • 120 ml milk

2ND MIXING BOWL:

  • 200g plain flour
  • 2 t baking powder
  • 1/2 t salt

FRUIT:

  • 175g diced dates
  • 75g diced dried apricots
  • zest of half an orange


For the topping, blitz up your oats until they resemble fine crumbs. You can leave them chunkier if you want of course, but I like mine like this:

IMG_3327

Then simply mix your oats in with the melted butter, sugar and cinnamon to form a crumbly mixture and set aside. If it’s quite wet and gooey as opposed to crumbly, add some more oats – it is crumble cake, after all!

In your first mixing bowl, beat together the sugar, oil and egg for 3-4 minutes or until pale yellow and creamy (I used a stand mixer on a medium/high setting for this). Reduce your speed and mix in the milk and vanilla until combined – this should only take 20 seconds or so.

In a second mixing bowl, sift together the flour, baking powder and salt, and whisk this into the wet ingredients until the mixture just turns smooth. Then simply fold in your fruit until just combined, and it’s ready to pop into your tin!

I absolutely LOVE my spring-forced cake tin. I line the base with baking paper and mist the sides with cooking spray, and my cakes never stick which is CHOICE. I can’t remember exactly what size mine is, but it’s the perfect size for this cake – it doesn’t look very full when you first pour it in, but it rises twice as high when baking, so don’t be put off! Look at all those delicious bits of fruit:

IMG_3328

The last step is to sprinkle your topping on (SPRINKLE, don’t press it down or it won’t crumble properly!), then whack in the oven on fan bake at 180 C. I’d set a timer for 45 minutes for a start, but it may take a wee bit longer if you use a smaller tin or if your oven is a bit different to mine – just check with a skewer to make sure it comes out clean. Don’t be check before 40 minutes, you don’t want your cake to sink!

Then for the hard part – taking it out of the oven and waiting for it to cool completely before removing from the tin. Honestly, it smells so good I had to go hide in my room for an hour to stop myself demoulding it early and making it crack apart.

It’s so pretty…

IMG_3330

Here’s a close up of the crumble topping, because it really is the best part! Sweet, buttery, cinnamony oaty goodness…

IMG_3331

And a shot of the inside, of course!

IMG_3332


YUM.

I cut mine into 16 slices (carefully, or the crumble topping will crumble right off!), and it came out at 230 calories a slice. Definitely not diet food, but if you’re managing your eating then you can definitely make a slice fit – the hard part is stopping at just one!

I’m sure there are plenty of other variations you could make – walnuts would be divine (as they are in everything), or white chocolate and raspberries…I will definitely be trying some other variations before winter is over!


Happy baking, and enjoy the last long weekend for a while!


Mish x


Just a spoonful of sugar…

Just a spoonful of sugar…

…and by a spoonful, I mean a cup and a half, plus extra for rolling, because this week we’re kickin’ it old school and making ‘proper’ baking; no zucchini, no applesauce, no greek yoghurt, these recipes are eggs/flour/sugar/oil and are two of my favourite recipes ever.

And yes, I said ‘recipes’ – double recipe post, baby!

Molasses is one of my go-to ingredients to use in baking, because of the warm spiciness it adds that brown sugar doesn’t manage by itself. Combined with ginger, cinnamon and cloves, these cookies burst with soft, chewy warmth. And the cupcakes…if you’re one of those people who thinks vegan/gluten-free baking is never quite ‘the same’ without all the eggs and butter, then I promise that these will change your mind forever.

My Bitch Bake this week was a double for the Night Shelter, so that meant finding time to bake not one but two lots of goodies to box up and deliver. I considered all sorts of things – banana oatmeal muffins, chocolate cake, peanut butter chickpea blondies (just trust me on that one) – but in the interest of time (and my sanity), I decided to play it safe, stick to what I know, and save the more creative baking for the weekend (watch this space – date and walnut banana bread is coming your way!). Plus, the weather has definitely taken a turn towards winter here, and sometimes you just need a little bit of actual sugar in your life to lift your spirits.

Let’s start with the Molasses cookies, courtesy of Texan Erin. I did change these slightly, but mainly because I either didn’t have what the recipe called for (how the fuck did I of all people not have cinnamon in the pantry?!), or just went by feel. None of the tweaks were to cut calories out – if anything I added them in!

In a mixing bowl:

  • 266g plain white flour
  • 1 1/4 t baking soda
  • 1/2 t salt
  • 1 t ground ginger
  • 1/2 t ground cloves

In a bigger mixing bowl:

  • 100g soft brown sugar
  • 130g blackstrap molasses
  • 5 T canola oil
  • 1 egg
  • 1 t vanilla essence
  • 25g chocolate chips

In a small bowl to the side:

  • 50g raw sugar


Basically, sift/whisk everything in the first bowl together, whisk everything in the second bowl together, tip the dry into the wet and mix until just combined. At this stage it probably would have been a good idea if I’d refrigerated the dough for 30 minutes or so, but it was storming so hard outside that Sky was losing it’s signal, so I had no Great British Bake Off to distract me. I just had to flour my hands slightly as the dough was a touch wet and sticky.

Take heaped teaspoons of dough and roll into balls, then roll in the raw sugar before placing on a lined baking tray. Flatten them down slightly, but make sure they’re well spaced as they will spread out and puff up.

So you get the idea, the baked ones are on the right:

IMG_3309

Fan bake at 180 C for 8 minutes and you’re done!

OMFG look at the inside of these things. SO SOFT.

IMG_3310

I know they’re for charity, but I ate four of them because I just couldn’t stop myself…good thing I managed to get 34 cookies from the mixture, which meant they were ‘only’ 72 calories each, so not the worst cookies to binge on (at least that’s what I’m telling myself right now).

As for the Vegan/GF Chocolate Cupcakes, we have the incredible Chloe Coscarelli to thank for these. I think I will always swear by them as the best cupcake recipe I have, and they’re vegan AND gluten-free…I don’t think I’ll ever wrap my head around that!

In a big mixing bowl:

  • 200g gluten free flour (I used Edmonds)
  • 200g caster sugar
  • 50g cocoa powder
  • 1 t baking soda
  • 1/2 t salt

In a separate mixing bowl:

  • 1 C almond breeze almond/coconut milk blend
  • 1/2 C canola oil
  • 1 T vanilla essence
  • 1 1/2 T apple cider vinegar
  • 3 t instant coffee powder


You probably know the drill now – sift the first big bowl together, whisk the second bowl together, tip wet into dry and mix until combined! You can add chocolate chips if you want, just be mindful of what kind you use if you still want your cupcakes vegan.

I wanted my cupcakes to go a long way, so I made baby ones – 46 of them in fact! AND because the recipe has actual fat in it, you don’t need to spray your liners! HURRAH!

Whatever size you make, fill your cups about 2/3 full (no more – they rise a LOT) and bake at 180 C. My baby ones took 10 minutes, I’d check larger ones after 15 and see how they’re going; as with any cupcakes, the skewer should come out with a couple of moist crumbs on it and nothing else.

Look at that crumb structure. They’re SO light and delicate, hnnnnnnnng…also, how shit is this photo :/

IMG_3318

Oh yeah, the ones in the back ground are going to work for a colleague’s birthday, so I topped those ones with a chopped up Crunchie bar – happy birthday, Chris, I hope you like diabetes!

Nah, these are so tiny that (sans the Crunchie) they’re ‘only’ 60 calories each, so you’d need to eat a lot of them – that is possible though, they’re so full of delicious cocoa it’s reeeeeally hard to stop.

You can decorate them however you like – I just dusted them with extra cocoa powder for a little something extra, but I reckon chopped peanuts would work really well on top, either before you bake them or after icing them. Mmmmmm…

Anyway, here you have it – one double bake for the Night Shelter!

IMG_3317


And I know I said no zucchini this week, but here’s the pizza I made for my dinner tonight – low-carb zucchini crust for the win! 

IMG_3316


Happy baking!


Mish x

Being a Good Bitch

Being a Good Bitch

Tuesdays are one of the biggest days of my week. I have my usual eight hour working day sandwiched around my weekly session with my personal trainer (which means staying late at the office to make up the time), then my weekly speed training session with my running club (shout out to Wellington Scottish, you guys are fab), before dragging my weary body home to shower and rustle up something resembling dinner (normally eggs on toast with grated veggies, because bugger any extra effort at that time of night).

Then there’s Tuesdays like today, where Past Me decided that a Wednesday bake ‘n’ drop for Good Bitches Baking was a good idea, which meant I also needed to fit a bake into my Tuesday night…not sure what this ‘sleep’ thing is that people talk about, but I’m not super familiar with it right now!

For all my blustering and complaining, I absolutely love being a ‘Good Bitch’ for the GBB Wellington Chapter. I’m sure it’s clear by now how much I love to bake, and GBB provide me with an outlet to bake regularly while also giving back to those who need a little extra TLC. I’m not curing cancer or beating homelessness or anything like that, but I’m providing a dash of sweet support to those who are; my bakes have gone to Women’s Refuge, DCM, Wellington Hospital and House of Grace to name a few of the organisations GBB supports, so I hope the cookies and treats I deliver bring some small comfort to the people who need their services.

When I bake for myself I’m a bit of stickler for making sure it’s as healthy as possible (case in point: all my recipes I’ve posted so far). With my bitch bakes, I’m typically much more lenient; I’ve made banoffee cupcakes, burnt butter banana blondies, ginger molasses cookies…basically a whole bunch of things where I don’t even want to know the calorie counts, and all of which I will post at some point once I’m brave enough to actually work them out. We all need treats occasionally, and they’re all so delicious I definitely need them in my life again at some point!

Just look at them…yum.


This week’s bake was intended to fall somewhere in the middle – Rocky Road Brownie Cupcakes!

Basically, I took a brownie-style cupcake recipe which is designed to be lower calorie, and added a bunch of not-so-low-calorie things to it to make it rocky road-like. In this case, it was some cheapo-brand marshmallow Easter eggs I got given and didn’t feel like eating, plus the dregs of a bag of blanched peanuts I’ve not had much use for. Fucking hell, are peanuts calorie dense or what, but combine them all together and they balance out, right?

This is yet another one of those delightful recipes where you simply sift your dry ingredients together, whisk your wet ingredients together, then dump wet into dry – perfect for days like today where I just didn’t have time to cream A + B, then dissolve C into D and let it cool, then add X + Y in alternate lots, then stand on my head and mix it in an anti-clockwise motion while singing the national anthem…

Anyway, the ingredients are:

DRY:

  • 260g plain flour
  • 80g cocoa
  • 1 1/2 t baking soda
  • 200g soft brown sugar
  • 1 1/2 t salt

WET:

  • 200g unsweetened applesauce
  • 4 t canola oil
  • 1/2 C cold coffee
  • 1 C water
  • 2 t apple cider vinegar
  • 2 t vanilla essence

EXTRA GOODIES:

  • 35g peanuts, halved
  • 3 marshmallow easter eggs, diced
  • 60g plum jam 
  • an extra 25g cocoa
  • 10g dessicated coconut

Yes, you read that correctly – there’s no molasses in this! I ACTUALLY made something with real sugar!

Like I said, sift your dry into one bowl, whisk your wet into another bowl, then add your wet into your dry and mix until barely combined (you don’t want to overwork the gluten, or they won’t rise properly and will be kinda gummy). Gently fold in your nuts and chopped marshmallow, and spoon into 24 well greased cupcake liners (you’d probably get ~18 if you made regular sized muffins), and bake at 175 for 15-18 minutes or until the top bounces back when pressed lightly. Then just whack them out of the muffin try and onto a rack to cool!

The marshmallow got a little explode-y, but I’m pretty pleased with how well this semi-made-up recipe actually baked up.
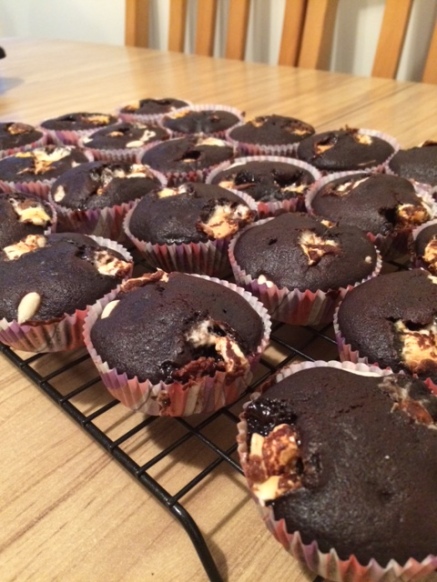
IMG_3302

Because this was a Bitch Bake, I added a little extra naughtiness and actually iced them. None of that schmancy business where you have more buttercream than cake and then drown everything in sprinkles, just the extra cocoa powder mixed with jam and smeared on top, with a sprinkle of coconut to finish.

I’ve never made this kind of glaze before, I don’t even know if it’s a ‘thing’, but jam seemed like a logical way of getting moisture and sweetness into the cocoa without adding a fuck ton of icing sugar/butter/milk and having to beat the living daylights out of it. The cupcakes themselves aren’t really sweet (classic me, halving the sugar), but there’s enough sugar in the jam to give a touch of sweetness to each bite.

Just look at how glossy it turns out! It’s literally cocoa powder and Select Plum Jam, I still can’t believe how well it worked! And it’s so sweet and chocolatey…
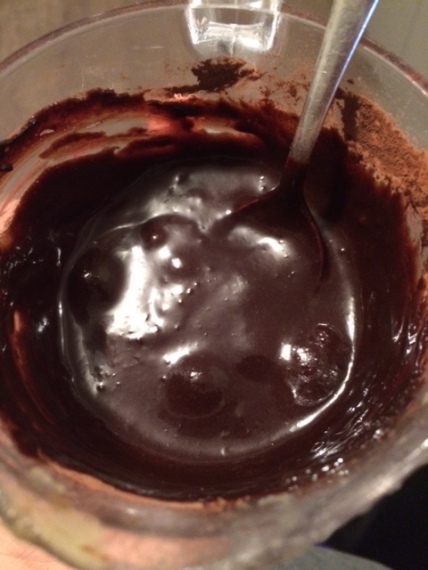
IMG_3300

A yield of 24 cupcakes means the recipe comes out to ~120 calories a pop, which is lower than I was expecting – oh, the joys of using applesauce and cold coffee instead of butter and milk! They’re only small though, so there’s not a huge amount of ‘bang for your buck’ in terms of being low calorie. Still, if you just need a couple of mouthfuls of sweet, chocolatey goodness to soothe a craving then there are definitely worse things you could eat – like the chocoholic cake I made for my 21st. It’s still my favourite cake recipe ever, and I’ll share it one day, but there’s a reason I had to join a running club – you’ve been warned!

As with some of the other recipes I’ve posted, you can swap out the peanuts and marshmallow egg for all sorts of things – chocolate chips, glace cherries, m&m’s, other nuts, or change the flavour by swapping the vanilla for peppermint, or grate in orange zest…I’m now imagining what white chocolate chunks and swirling through peanut butter would be like, and am going to dream about this all night no doubt…sigh.

Another wee fun fact about these is that if you take out the marshmallow eggs, they’re dairy-free and vegan-friendly, and obviously leave out the peanuts if you can’t have nuts – I’ve also had good experiences swapping standard flour for Edmonds gluten free baking flour, if you wanted to try make these gluten-free as well. Now that I’m sitting down and thinking about this, it’s actually a really allergy-friendly recipe, woot!

So, here is the final result, boxed up and ready for delivery first thing tomorrow morning. Only 16 fit in the box, and as they’re iced I couldn’t stack them…such a shame. My flatmates will no doubt be devastated when they find out they might actually have to help eat the rest.
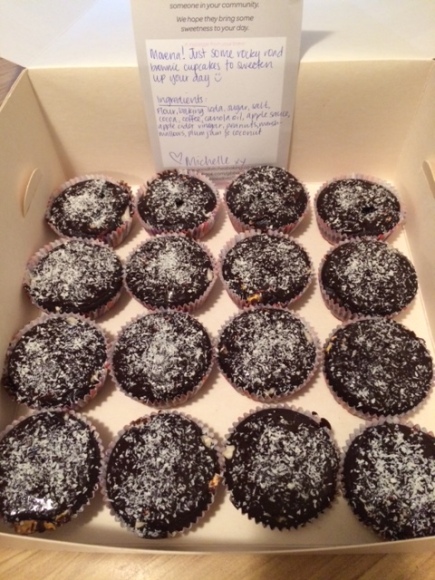
IMG_3303

If being a Good Bitch is something you think you’d like to have a go at, do have a look at the website linked above and reach out to your local chapter. If you have a car, you can always be a driver as opposed to a baker, or just give a few dollars to help cover the cost of the cake boxes – every little bit helps! 

It’s now officially midnight, so I’m gonna leave it there…fire any questions my way via the comments section, otherwise keep your eyes peeled next week for yet another recipe experimentation! I might even go savoury next time…


Mish x

A lust for comfort…

A lust for comfort…

In the words of the great Mary Berry, ‘It’s so comforting to have a small piece of cake. Just one slice.’

Oh boy, did I want to eat cake on Monday.

It’s funny how last week’s attempt at getting myself out of my comfort zone resulted in my wanting nothing but comfort food to shove in my mouth – in this case, going on a date for the first time in about six years. Without going into too many details, Monday lunchtime saw my phone buzzing with the dreaded ‘you’re great but let’s just be friends’ text message; my tummy froze, my face flushed, and all I wanted to do was to barricade myself in the Cake Society across the road and eat my body weight in brownies. Mary, you know me too well!

In hindsight, it was actually pretty good timing – it wasn’t a fun afternoon at work by any means, but by the time I was ready to leave I’d moved on from the ‘why am I not good enough for this guy and how much chocolate I should buy on the way home?’ phase to the ‘screw him, I’m gonna smash it out at the gym before going home to make a really big healthy dinner!’ phase. 18 months ago, I’d have not made it beyond phase one, and would have gone home and cried into cake and ice cream, but I’m starting to win my battles with both my self esteem and my eating. It’s a comfort in itself that I can now find peace in endorphins and looking after myself as opposed to just mainlining sugar.

62 minutes on the bike and about 6 litres of sweat later, I followed through on my promise to myself and made a super scrummy dinner of beef and broccoli with cashew nuts on carrot noodles. The satisfaction of knowing I wasn’t filling myself with crap I’d regret later ended up being waaaay more comforting than cake (sorry, Mary).

IMG_3284


But of course, there is no real comfort like baking! Luckily, I’d eaten my last breakfast blender muffin that morning, so what choice did I have but to make another batch?

I struggle to eat first thing in the morning, so my routine is to grab a coffee on my way to the office, then have a little munch around 10am to get me through to lunchtime. These muffins are perfect for that – full of oats, carrot and banana to give you a good dose of fibre and vitamins, greek yoghurt for added protein, and molasses, ginger and cloves for a hit of lovely, warming spice. No refined flour, no refined sugar, no added fats…they almost seem to good to be true!

The inspiration for these came from this Running With Spoons recipe, heavily tweaked because I’m incapable of following anything verbatim. The beauty of these is that you can change the base recipe in so many ways without ruining how the muffins bake. The first time I made them I used a nut butter as directed, which meant every mouthful was slightly peanutty (my mouth is watering just thinking about them, holy shit they were good), but this time I didn’t have any decent creamy stuff, so used greek yoghurt instead – not nutty, but it cut the calories way down which meant I had ‘room’ to add a generous helping of raisins instead. Next time, I might halve the raisins and add some walnuts – I’m imagining the texture as I write this and it’s making me extremely happy. Or using a flavoured greek yoghurt like passionfruit…urgh, I just want all the things right now!

This is how I made mine (this time):

DRY:

  • 120g rolled oats
  • 1 t ground ginger
  • 1/4 t ground cloves
  • 2 t baking powder
  • 1/2 t baking soda
  • 1/4 t salt

WET:

  • 2 eggs (use flax eggs/your fave egg replacement if you’re vegan)
  • 165g very ripe banana
  • 30g maple syrup
  • 30g molasses
  • 2 t vanilla essence
  • 75g unsweetened applesauce
  • 80g plain greek yoghurt (use the nut butter if you don’t want to use dairy)

Add at the end:

  • 175g finely grated carrot
  • 35g raisins
  • 40g whole oats


First off, whack all your dry ingredients in a blender and pulse until your oats resemble fine flour. My blender isn’t very big, so I dumped my dry mix into a separate bowl so I could then blend all my wet together without everything overflowing.

Once your wet ingredients are well blended, add to your bowl of dry ingredients and whisk together until well combined. Finally, add in the carrot, raisins and whole oats and stir these in until incorporated. My batter looked a bit like vomit, but I love the texture the raisins and whole oats add:

IMG_3285 (1)

From here it’s pretty easy – spoon your batter evenly into 12 greased muffin liners (as always, there’s so little fat in this that they’ll stick if you don’t grease your liners) and bake at 180C for around 18-20 minutes or until a skewer comes out clean.

You can make your muffins smaller to make them go further, but making 12 means one with a couple of healthy dollops of greek yoghurt is just the right amount for breakfast for me. Mine came out at 125 calories each, though this will vary based on what you take out/add in – using nut butter will ramp it up a bit, but then you don’t necessarily need the raisins as well (unless you want both – you do you!).

Breakfast is served! Mmmmmmmm…

IMG_3291

Seriously, though, look at all that yummy carrot, the chunks of oats, and I wish you could smell the heavenly banana-spice combo that wafted up the second I cracked this bad boy open!

IMG_3292

Anyway, enough writing – I need to get this muffin in my mouth ASAP!


Mish x

Oh, what a beautiful morning!

Oh, what a beautiful morning!

Today was a CRACKER. I feel a bit bad having spent most of the afternoon inside in the kitchen, because I really should have been making the most of the nice weather – I dread the day Wellington remembers what it’s weather is normally like and shits the bed entirely.

Seriously though, dat sun! I wish all my morning runs had views like this…

IMG_3276

I actually spent most of this weekend in the kitchen. Saturday afternoon was spent with a friend I hadn’t seen in a while (read: not even 3 weeks but that’s like a century for us) making caramel cheesecake banana oatmeal cookie pie things (yes, I made those up) and apple, raspberry and almond oatmeal crumble (which everyone should make because it is heaven). It was a really lovely afternoon with lots of laughter and endless sniffing of bowls of dough and varying mixtures, because I put cinnamon in everything and it smells SO GOOD.

These are the little cheesecakes – they have banana oatmeal ‘cookies’ as their base, then caramel cream cheese with extra caramel sauce and glace cherries on top. Healthier than your standard cheesecake as the base isn’t full of butter and I used light cream cheese, but still very much in the ‘very occasional treat’ bucket.

IMG_3274

But, these are not the focus of today’s post – instead, you guys get something a little more ‘me’, AKA something where the number of calories in it doesn’t make me faint. 

After going for a big run this morning (and then a big naughty brunch of waffles, but fuck it, I ran 14 kms so come at me), I went and did my weekly veggie shop at the local waterfront market. They had huge chunks of crown pumpkin for $1, and I am always on the look out for reasons to get my cinnamon out, so what else was I supposed to do but buy the pumpkin and make pumpkin spice muffins!

I used another Ambitious Kitchen recipe as my base, though my tweaks this time were purely down to me not having the required ingredients as opposed to actively trying to swap things out; not enough maple syrup, not enough pumpkin, no chocolate chips… it sounds like disaster, but my well-stocked pantry served me well and I had no issues finding suitable alternatives. 

So, if pumpkin spice muffins sound like something you need in your life, here’s what you need:

WET:

  • 350g raw pumpkin, diced
  • 75g unsweetened applesauce 
  • 1/2 C brown rice syrup
  • 60g butter
  • 2 eggs
  • 1/4 C almond/coconut milk blend
  • 1 t vanilla essence

DRY:

  • 140g plain flour
  • 65g wholemeal flour
  • 1 t baking soda
  • 1 t cinnamon
  • 1/2 t nutmeg
  • 1/2 t ground ginger
  • 1/4 t ground cloves
  • 1/4 t salt
  • 35g raisins

First off, roast your pumpkin until nice and soft and run it through a blender until pureed. You can steam it if you want, but roasting brings out a beautiful sweetness that steaming just won’t do. My 350g yielded about 3/4 C puree, so I added the applesauce to make up for this – banana would work well too, and will make your muffins a touch sweeter than the apple.

While your pumpkin is roasting, you’re going to burn your butter. Burnt butter is actual heaven, and if you don’t believe me then just promise me you’ll at least try it. It’s really simple – melt your butter in a small saucepan on a medium heat, and once it starts to bubble then keep stirring until it starts to smell nutty and change colour. The butter will kinda separate out which is totally fine – this is what mine ended up like:

img_3279.jpg

Once your butter has cooled down a bit (you don’t want it to scramble your eggs!) and your pumpkin is pureed, whisk them together with all the other wet ingredients and set aside.

In a separate bowl, whisk together all the dry ingredients (except the raisins), making sure you haven’t got any lumps of baking soda etc (use a sieve if you need). Tip your dry into your wet and mix until half incorporated, then add the raisins and gently fold in until just combined.

From here, spoon your mixture into greased muffin liners (I used patty cake pans to get slightly smaller muffins), then bake at 180C for 18-20 minutes or until a skewer comes out clean. Leave them to cool on a wire rack, which will be difficult given how amazing they’re going to smell when they come out of the oven, but be patient!

Just look at the little babies!

IMG_3280

Because I made smaller muffins, I got 18 muffins which came out at exactly 100 calories each. They aren’t huge, but give you a few cozily spiced mouthfuls of yum if you need a little boost in the afternoon. If you’re someone who doesn’t need a lot of breakfast in the morning, a big one of these with a dollop of greek yoghurt would be a great way to get some protein, fibre and carbs into you to kick start the day!

There are heaps of variations you could explore too – chocolate chips or nuts instead of raisins, cold coffee instead of milk, and the maple syrup would definitely have made these sweeter. Hell, I ate one with a teaspoon of peanut butter spread on top – 10/10 would do this again! Plus, you can easily swap out the butter/eggs for oil/flax eggs to make these vegan if that’s your jam.

As always, feel free to ask me a question if anything doesn’t make sense or if you’re curious about something. Otherwise, happy baking!

Mish x

I’m a little veggie ninja…

I’m a little veggie ninja…

This past Christmas was an interesting one in our household. My little brother didn’t come home for the first time ever, and I was solidly on the strict AF calorie counting bandwagon, so it left Mum a bit unsure of how to go about her Christmas groceries – there was no point in making the usual marshmallow balls/tan square/whole cheesecake for just her and Dad, so she asked me if I wanted to look after dessert to be sure I could comfortably eat it. I happily accepted (thank God for supportive parents!), and proceeded to make her immediately regret this decision by asking her to buy things like avocados, almond milk and Stevia. My father hates avo, and one of our family friends who was coming for Christmas dinner is well known for his refusal to eat ‘green shit’, which is basically anything other than meat/potato/carrots.

I had far too much fun blending avocado flesh on the sly so the men didn’t see that the chocolate ‘mousse’ I was feeding them didn’t actually have any cream in it. Needless to say, the mousse (served on top of greek yoghurt and stevia-sweetened diet brownie, huzzah) was an absolute hit, and the truth only came out when the boys asked for seconds and Mum and I couldn’t keep straight faces any longer. Thus, my love of hiding veggies in desserts was born.

I try and keep an eye on my refined sugar/carb intake (even if sometimes that is simply acknowledging that what I’m eating has waaaay too much fucking sugar in it and then eating it anyway), and there are a few little tricks I’ve learned so as to moderate my carbs while still having treats. One of my favourites is…drum roll please…zucchini.

Yes, you read that correctly. Today I present to you chocolate zucchini muffins.

As usual, I have taken someone else’s recipe and then fully rewritten it (sorry not sorry). This recipe comes from one of my absolute favourite websites ever, Ambitious Kitchen. Monique’s recipes focus on clean, healthy eating, and generally always include gluten-free/vegan alternatives; the chocolate zucchini bread recipe I used is the most allergy-friendly thing I’ve found that isn’t bottled water. Her site is always my first port of call when I need to make something for a potluck, because I can find really delicious recipes that pretty much everyone can eat.

But, like I said, I still fiddled with this bad boy, so here goes:

WET

  • 1 egg
  • 160g grated zucchini
  • 120g unsweetened apple sauce
  • 30g maple syrup
  • 40g blackstrap molasses
  • 1 t vanilla essence
  • 1 t apple cider vinegar
  • 1/2 C Almond Breeze unsweetened almond coconut blend
  • 1 T instant coffee powder

DRY

  • 125g rolled oats
  • 50g cocoa powder
  • 1 teaspoon baking soda
  • 1/4 teaspoon salt
  • 35g Trade Aid milk chocolate, roughly diced

Squeeze the excess moisture from the zucchini and drain, then add all remaining wet ingredients and mix together until well combined. I warn you, it will look like vomit:

IMG_3258

Whisk all your dry ingredients together in a separate bowl, ensuring any non-chocolate chip lumps are gone, then mix this into the wet until well combined. This will make it look more like normal chocolate cake batter, just a bit more textured:

IMG_3260

Now, because I stripped so many calories from this recipe (seriously, I’ll tell you at the end), I figured it couldn’t hurt to add a few back in. Once all my batter was divided into my well-greased muffin cases* (I got 11, but you could do 10 sightly larger muffins or 12 smaller ones),  I diced up 60g of glace cherries and just kinda poked them into the top of the muffins so they were only just showing. If you really like cherries and aren’t worried about the calories, just chop up a whole bag and mix it through your batter with the wet ingredients, that way you can have bits of cherry with every mouthful. Same with the chocolate chips, or you can use nuts, raisins, just get creative!

Bake at 180C for 20-25 minutes, or until a skewer comes out almost perfectly clean. Let those bad boys cool for a few minutes, then transfer to a wire rack to cool completely. They don’t rise a huge amount, so I could easily have made 10 slightly larger muffins without them going everywhere, but I’ve only ever made this as a loaf before so didn’t want to push it. 

But seriously, look at how dark and chocolatey these turned out! And those lovely bits of cherry peeking through…with no sign of any green, I might add!

IMG_3261

Now for the moment of truth – just how many calories are in one of these chocolate zucchini monstrosities?

I was able to lift the nutritional information straight from the packets for most ingredients, and used my trusty food scale as always (hence why my recipes are often in grams FYI), so for 11 muffins they came out at a mere 125 calories per muffin. By simply taking out the cherries, that drops to just 108.

It probably sounds like fake news, but when you look back over the recipe, there’s no butter or oil, no refined sugar, no refined flour, no cow’s milk…you could even take the recipe further by using stevia instead of the maple syrup and molasses, though in my experience it can leave baking tasting a little plasticky; plus the richness of the molasses is one of my favourite parts of this recipe. 125 calories per serve is pretty darn good in my book, though, especially if I’m getting chocolate AND cherries for that. That said, these aren’t iced, and icing them makes them absolutely perfect.

But Michelle, I hear you say, icing is full of sugar and fat! Why undo all your hard work?!

Come on, guys – you really think I haven’t got a totally mental version of ganache as well? Who needs melted chocolate and heavy cream when you have cocoa powder and greek yoghurt?

But seriously, 150g of Kalo authentic greek yoghurt (Anchor Protein + has less calories but isn’t as creamy) mixed with 15g of cocoa and 10g of maple syrup is the best way to ice ANYTHING. If you want it sweeter then add more syrup, especially because the muffins aren’t super sweet to begin with. You can use icing sugar if you want, but with syrup you don’t have to worry about any lumps, and aint nobody got time for dat.

A dollop of ‘greek ganache’ and a scattering of coffee beans and sliced almonds later, your muffin is still only ~150 calories, and you would never guess it from the rich chocolate flavour of the muffin and the creaminess of the icing. But hey, I guess you’ll just have to try it and see!

IMG_3266

If you have any questions or comments then feel free to leave one below, otherwise, happy baking!

Mish x


*I say well-greased, but just as I forgot to add the vanilla into my last recipe, I forgot to grease my cupcakes liners, and my muffins stuck. There is no real fat source in this recipe, so do make sure to spray your liners if you want there to be any chance of your muffins coming out cleanly!